Architects are always looking to save time. I’ve found Sapphie Build in AutoCad to be a tool that does just that. Typically when you design a set of architectural plans for a production home in AutoCAD, you have a background for each different structural option for each different elevation. After you design, draft, and send your plan through ITR, whatever redlines you have will have to added to each individual option. By using Sapphire Build in AutoCAD, you save all that time. Sapphire Build allows you to change the specific option, which will update it for every view that has that option on it.
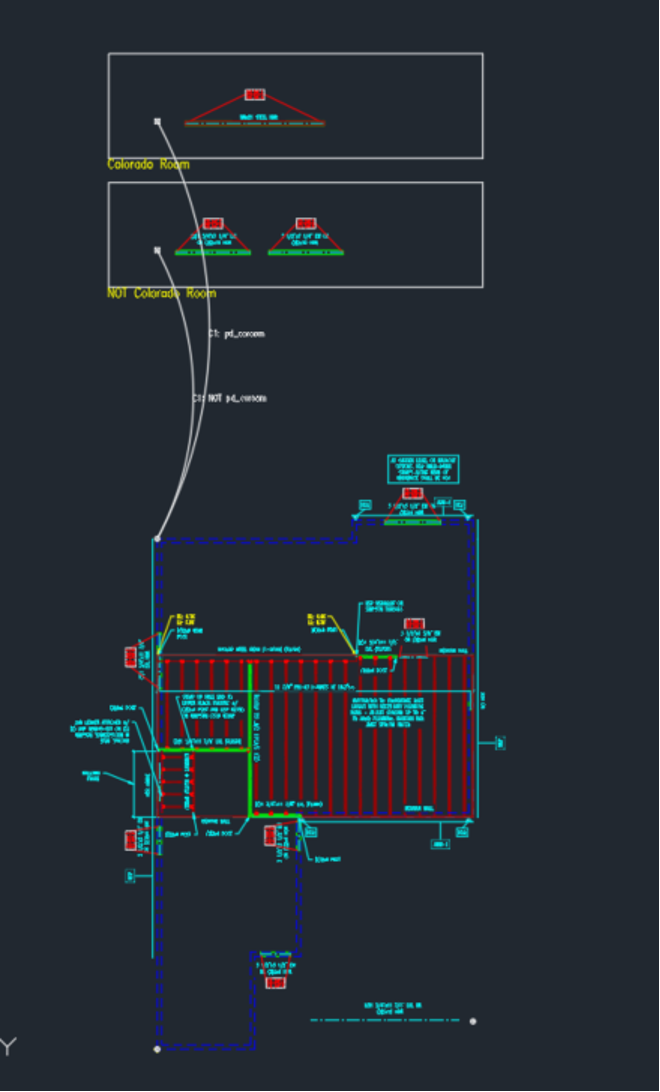
The first thing you must do when setting this up is creating your base model within your structural constructs. Base models have everything that won’t change between the different options in your construct. After you set up your base model, it is time to set up your box options. Some examples of the different options you might have are different elevations, soil bearing pressures, or window packages.
When you make your box option it will ask for a base point, option point, and option string. You put the base point on the part of the base model where you want that specific option to be added. The option point is placed within the option box. The option string is the specific set of options the engineer needs to choose for that option to be chosen. You are also able to add “and”, “or”, or “not” statements in the option string for even more customization in your box options.
Sapphire Build in AutoCAD is an innovative tool to use when creating master sets for production homes. It allows you to have all your different options isolated to allow for easier editing. The option string customizations give the client more flexibility in adding different features to their homes. Also, it allows you to create site specifics for the different homes in under an hour.