Green Valley Ranch Amenity Center – A Fully Assembled PEMB Frame at a Glance
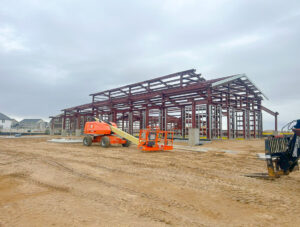
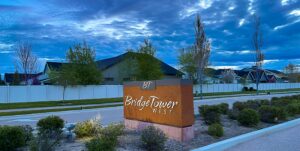
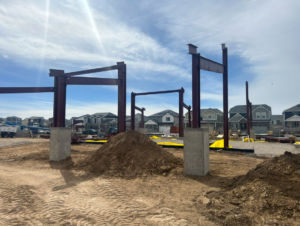
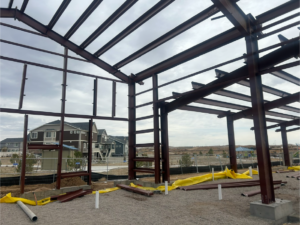
1A | Site Photograph of Southeast Corner Following Steel Erection
EVStudio is excited to share progress on the GVR Amenity Center. Crews have completed most of the steel erection. They have placed and secured all framing elements to the foundations. Next, they will install exterior finishes such as metal roofing and fascias. These steps will happen in the coming months.
Above, see the completed building skeleton. Then, compare it to the finished design in the render below.
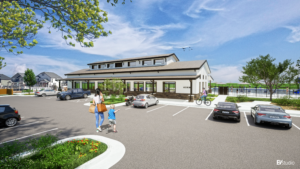
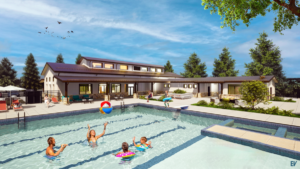
1B | Render of Southeast Corner
Construction Update – A Fully-Fledged PEMB Structure
Between March and early April 2025, the general contractor, Taylor Kohrs, quickly completed steel erection of the Pre-Engineered Metal Building (PEMB) frame. Sunward Steel Buildings designed the PEMB. Meanwhile, EVStudio’s Structural studio designed the foundations.
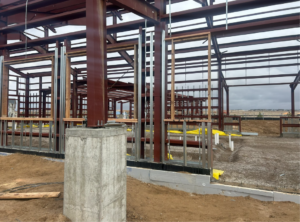
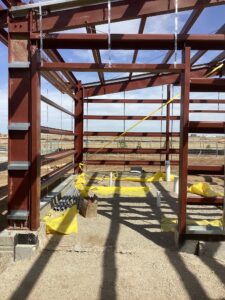
2 | PEMB Frame at Concrete Pilasters
Crews anchored the frames directly onto concrete foundations and pilasters at the open porticos. After finishing the portico framing, they began the remaining wall and roof framing for the PEMB. Later, teams will finish the pilasters with stone veneer.
Sunward Steel Buildings generously provided the floor plan below. This helpful roadmap highlights framing conditions and key points from EVStudio’s late-March site walk with architectural and structural designers.
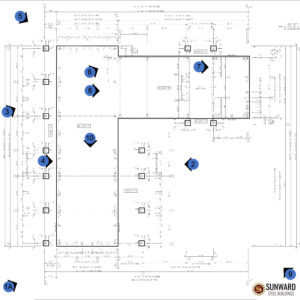
Legend | PEMB Framing Plan – Roadmap of Site Walk Points of Interest
The numbered tags above match the images before and after this section. Although these photos show only a portion of the unique framing conditions at the Amenity Center, EVStudio carefully selected the most informative and representative areas of the PEMB structure.
These images showcase the key advantages of a PEMB system. The components arrive prefabricated, ship directly to the site, and assemble in just three weeks. That timeline is impressively efficient—far faster than traditional wood- or metal-stud framing methods.
Site Walk – Experience for EV’s Designers

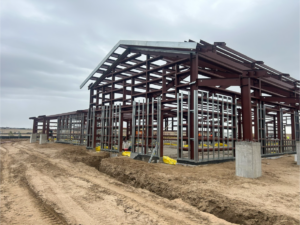
3 | East Elevation – Entry Area and Sitework
Steel erection in this area is nearly complete. Only the roof purlins at the uninsulated portico remain. Crews have installed all wall girts and roof purlins at both the lower and upper roofs over the main Community Room.
The image above shows the primary entrance to the Amenity Center. Teams have prepared rough openings for future window and storefront systems. The silver metal framing visible above includes furring channels, which will support the upcoming exterior wall sheathing.
Now, the building’s final form is beginning to take shape. A cascading roof tier descends from the clerestory peak down to the open ground-level portico.
At ground level, crews have begun installing hardscape elements like curbs. Concrete walkway pours will follow soon.
4 | Foundation and PEMB Conditions at Primary Building Entry
To the far right of the image above, you can see rough openings for storefront and sidelite systems at both the main and pool entry doors.
Here, finer building components become visible. These details show how the PEMB system connects to finish materials and foundations. Vertical PEMB members attach directly to concrete foundations and pilasters using base plates and anchor bolts. The white-painted elements protruding from the ground are foundation insulation, required by IECC standards. Behind that, liquid-applied damp-proofing on the foundation wall’s exterior face.
Despite the steel structure, crews used wood blocking in window openings. This provides a non-combustible surface to fasten window nailing flanges.
Above the window and door openings, thin vertical metal strips—called Insul-Hold insulation hangers—are visible. These barbed strips puncture wall batt insulation to keep it securely in place.
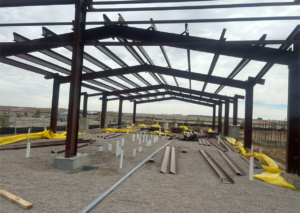
5 | Northeast Corner – Water Entry Spaces and Wall Framing
As shown in the image above, crews have not yet installed the roof purlins on the portico roof. Based on site observations, they typically install the eave struts first. These struts extend from the columns and define the roof overhang before the purlins go in.
In the foreground, trenching for underground utilities is clearly visible. These lines will serve the Fire Riser and Water Entry spaces.
6 | Interior View at Fitness Space – Meeting of 2 Structural Systems
In the image above, two structural systems join together. The lower ‘Building E’ connects into the side of the taller ‘Building A’. Although structurally independent, the two systems link through PEMB elements called sidewall girts. These girts span between the column webs of each structure.
Below, plumbing rough-ins and structural grade beams are visible beneath the layer of below-slab aggregate.
7 | Door Jamb at Pool Storage Room
To the far left of the image, you can see flanges installed within the web of the PEMB column. This framing piece, called a sheeting angle, provides a fastening surface aligned with the wall girts on the right. Crews will later attach hat channels, sheathing, required insulation, and exterior wall finishes to this uniform face.
Wall girts and PEMB columns connect to the vertical door jambs using welded clips, which remain concealed. Just above the foundation, steel runner channels are sandwiched between the concrete and PEMB framing. These channels hold the wall cavity insulation in place.
At the door rough opening, the foundation wall is notched to allow the concrete slab to pour over it. The white panels—foundation insulation—peek through the gravel and mark where the slab’s underside will sit.
8 | Interior View of Locker Rooms – Rough-Ins for Underground Utilities
In the image above, the wall girts have not yet been installed to brace the PEMB columns horizontally. Many of the girts are visible, lying in the gravel.
Through the gravel aggregate, you can spot numerous floor drains and rough-ins for future plumbing fixtures, indicating this is the Locker Room space. Based on the rough-in layout, it’s clear that toilets will be placed in the center of the room, while lavatories will align with the exterior walls.
The image also provides a close-up view of the PEMB purlins, which resemble a backward ‘S’. Those with a keen eye notice that many of the purlins are secured to the PEMB rafters with anti-roll clips. These clips prevent the purlins from twisting or collapsing under heavy loads. Essentially, they serve as a substitute for bridging and cross-bracing found in wood-framed assemblies.
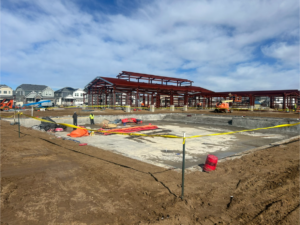
9 | Concrete Pour for Pool Deck
The Amenity Center’s volume is dwarfed by the vast pool and its surrounding deck and recreation areas. These amenities will serve the large number of production-style homes seen in the background.
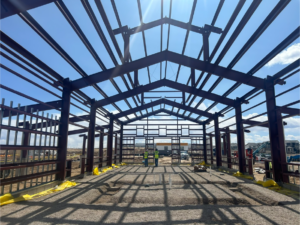
10 | Interior View – Roof Tiers and Rough Openings
The final curated image provides a clear approximation of the building’s volumetric form and future experience.
The three-tiered, cascading roof planes are clearly visible, while the rough openings in the wall systems suggest plenty of glazing for interior spaces. The door openings indicate planned traffic flow through the finished areas. Additionally, trenching in the gravel reveals the foundation and underground utilities required for an enclosed space that has yet to be framed.