Green Valley Ranch Amenity Center
The Green Valley Ranch Amenity Center has reached a major, yet often misunderstood, milestone—Dry-In.
According to blog posts from DryLok Masonry Products, they define Dry-In as follows:
“The term dry-in is significant in the construction industry because it establishes the point in the construction process where the rough exterior work has been completed: windows, doors, roofing felt or shingles and a weather-resistant barrier have all been installed. The contractor can turn their attention to the next stage in the process — roughing in the electrical, plumbing and mechanical components.
The term “dry-in” is used because it means the building is basically waterproof at this point. Finish materials can be stored inside the shell without fear of damage from the elements, and those working on the structure can complete their work under favorable conditions.”
Dry-In refers only to completing all exterior waterproofing and insulation elements. However, it does not include final exterior cladding. Since the finishes are designed as a rain screen, they help shed water down and out. However, they do not play a major role in preventing water from entering the building.
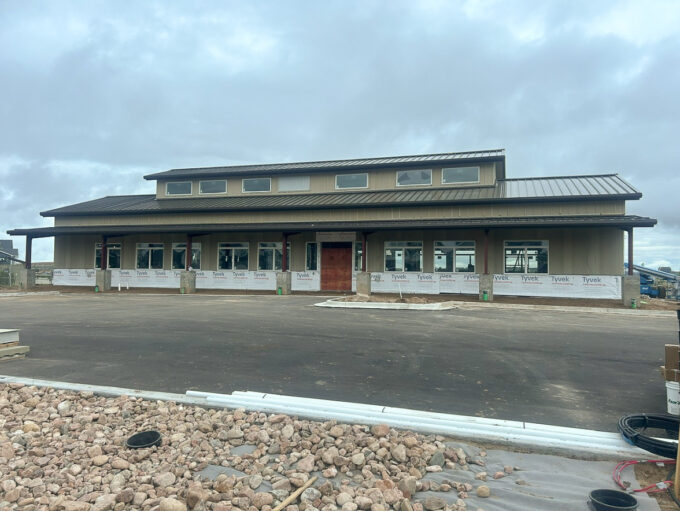
Currently, the windows, roofing, and board-and-batten finishes are complete at the upper levels.
Meanwhile, crews are still installing vertical battens and stone veneer at the portico level. Even though the cladding remains incomplete, viewers can see finished flashing and weather barriers on all wall faces and openings.
Therefore, the team can now store weather-sensitive materials safely inside the partially built structure.
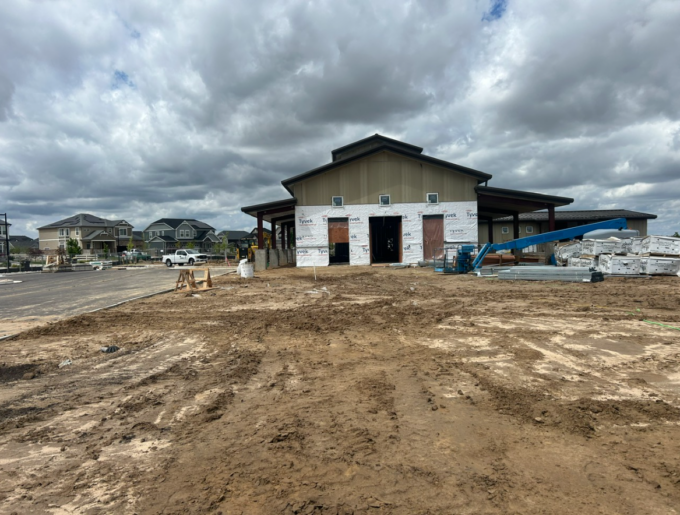
As attention shifts to the South Elevation, viewers notice the cladding is even less complete. Permanent doors remain uninstalled. Instead, temporary OSB and plywood panels help maintain Dry-In status.
Much of the Weather Resistive Barrier is still exposed. Where it’s not, unpainted fiber-cement board substrates lack vertical battens. Additionally, the team has not yet added fiber-cement trim around window openings. However, all windows are properly flashed and waterproofed.
Speaking of flashing, drip-edges have already been installed where future material transitions will occur. This comes even though work on the adhered stone wainscot and board-and-batten cladding has not started.
Taking a Peek Inside
The main benefit of reaching Dry-In status is interior protection from outdoor elements. Now, crews can safely store and install materials that aren’t waterproof.
For example, they can begin installing metal wall studs and drywall. These materials are now shielded from corrosion and mold caused by exposure to the elements.
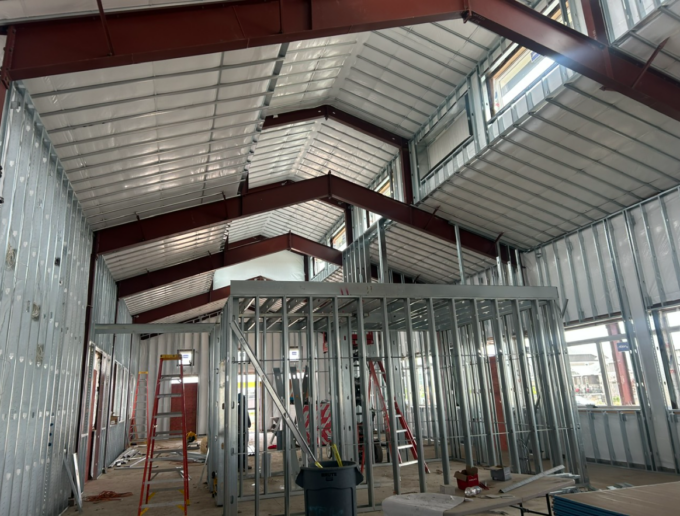
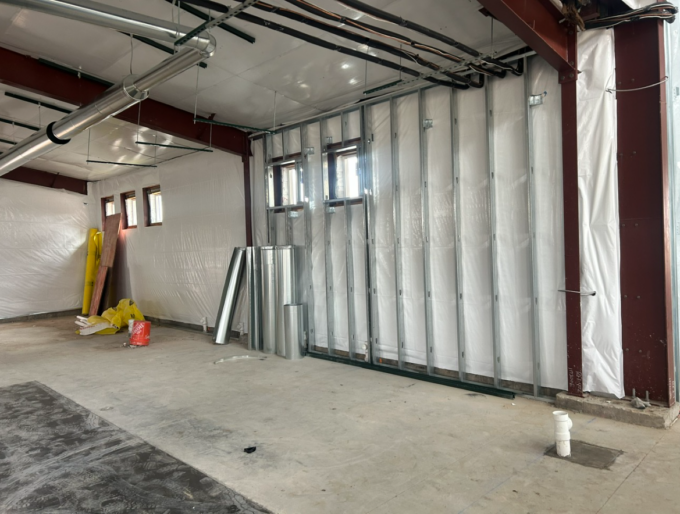
Wall framing has advanced significantly since EVStudio’s last site visit. Now, all walls are framed up to the lower ceiling heights.
Next, crews will install the pre-cast concrete planks for the mechanical mezzanine. This area appears at the center of the photo above. After that, they will frame walls up to the underside of the roof.
In addition, hat and runner channels are already in place. These will support drywall ceilings, which crews will install later.
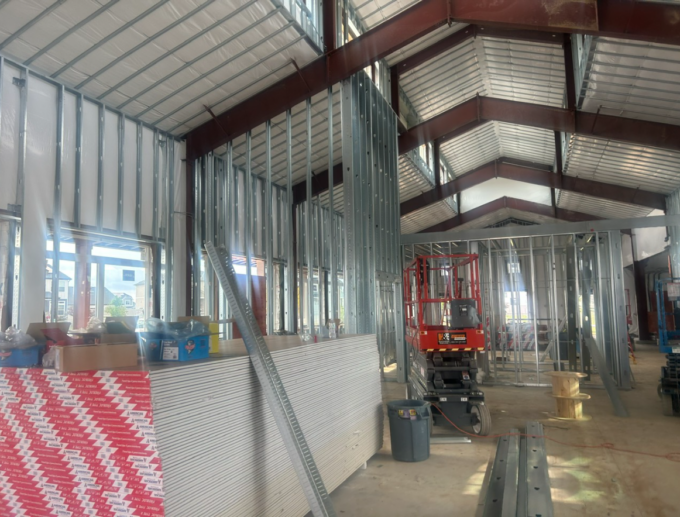
On the opposite side of the mechanical mezzanine, the open Community space is being used to store drywall panels and metal stud items such as Base plates and deflection tracks.
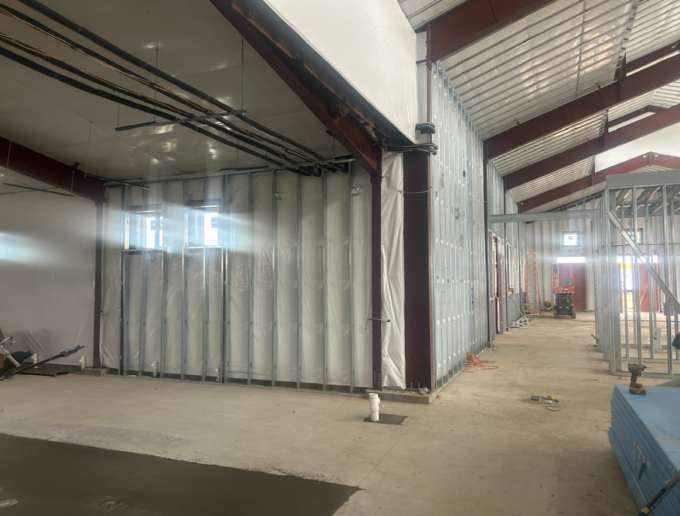
Inside corners of PEMB-framed structures become a complex area of concrete foundations, wiring, bends in plumbing lines, and unique PEMB connectors.
Where the two framing lines meet, crews have stretched the vinyl-facing of the batt insulation around corners. They’ve carefully tucked it between sections of steel framing.
This area also presents a challenge for electrical wiring. Viewers can see the wires tightly secured to the steel columns, then disappearing into the insulation cavity. A few feet away, it re-emerges as ceiling-hung conduit.
Inside of the exterior insulation, crews have installed an additional layer of metal studs. This allows them to run water supply lines to lavatories and toilet fixtures.
In the bottom right of the photo, viewers can spot the plumbing rough-in. These lines will serve the drinking fountains in the Fitness area.
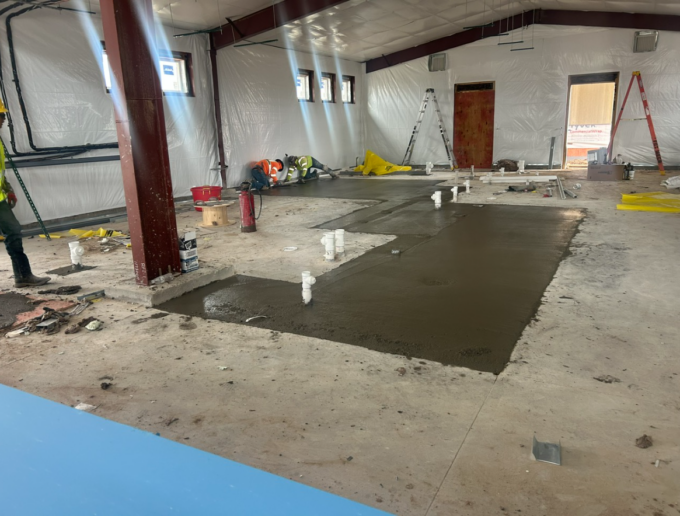
The Locker Rooms will eventually feature the bare concrete slab visible in the photo. However, crews still need to seal, stain, and apply an anti-slip coating.
Meanwhile, the darker, damp patches on the slab are fluid-applied waterproofing layers. These protect areas beneath the shower pans, toilet stalls, changing spaces, and janitorial closet.
The fluid-applied waterproofing has dried in the photo above.
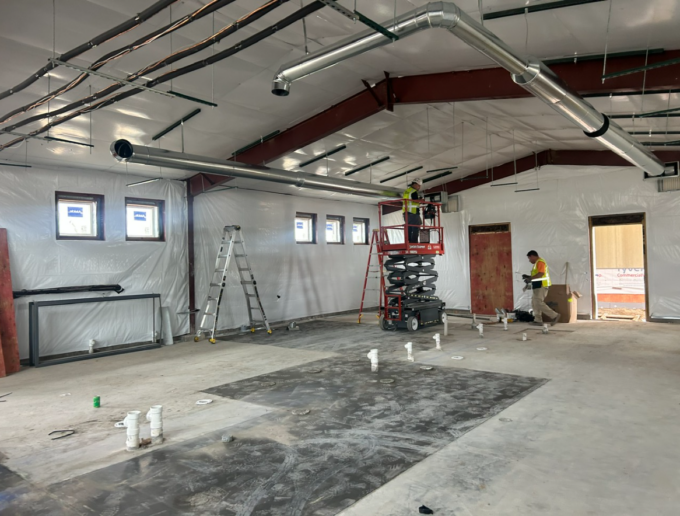
Installation of ducting has begun and awaits the fabrication of ceilings.
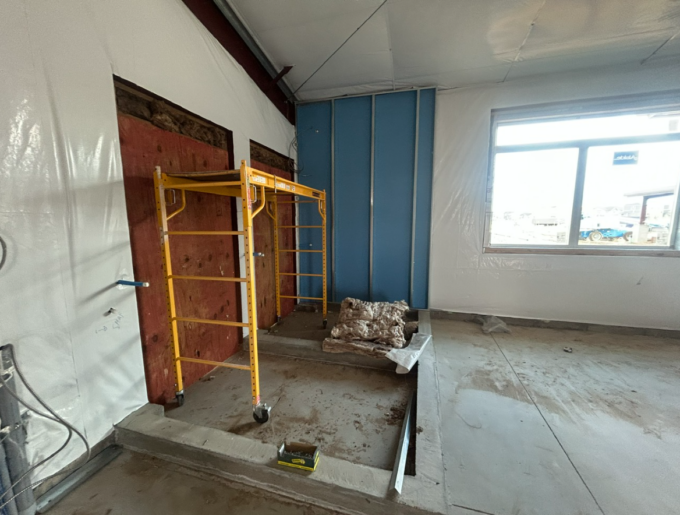
Our final photo shows the early stages of the Pool Chemical Storage rooms. Pool and Building Codes require these rooms to be 1-hour fire-rated and contain any chemical spills. Crews poured a raised concrete perimeter to protect adjacent spaces from chemicals. This curb keeps wall finishes—especially drywall—from absorbing and transferring pool chemicals. Permanent exterior doors will include a tall rubber transition strip. This barrier will stop chemicals from escaping to the outside.
The 1-hour rated enclosure is now taking shape. At the back, blue Type ‘X’ gypsum board is installed up to the roof. On the opposite side, crews will install 1” gypsum shaft liners up to a rated ceiling. Together, these layers form a complete 1-hour fire-rated enclosure designed to contain hazardous, flammable chemicals in case of smoke or fire.
While much of the framing and finishes remain incomplete, EVStudio is eager watch the Interior Build-out progress in coming weeks!
EVSTUDIO Was Proud to Partner For This Project!
Our own Architect Jeff Scott and M&P Engineer Jon Anderson were the team on the job! Electrical was handled by an engineer Trevor Karstens with Karstens Engineering LLC.