Prologue: EVstudio has designed several apartment/condo buildings recently, and all of them have one thing in common. That’s right! Each one utilizes a post-tensioned slab to elevate the “living space” and create usable space below. While PT slabs are nothing new, they continue to provide an efficient and flexible building system for both multi-use and residential type buildings.
We are going to take a look at what will be Building E on the South Sitzmark Site in Winter Park. Quick summary: the structure consists of below-grade parking; an elevated post-tensioned slab at grade; and wood framed walls and floors above. This entry will mainly focus on the construction of the post-tensioned slab and good habits to follow.
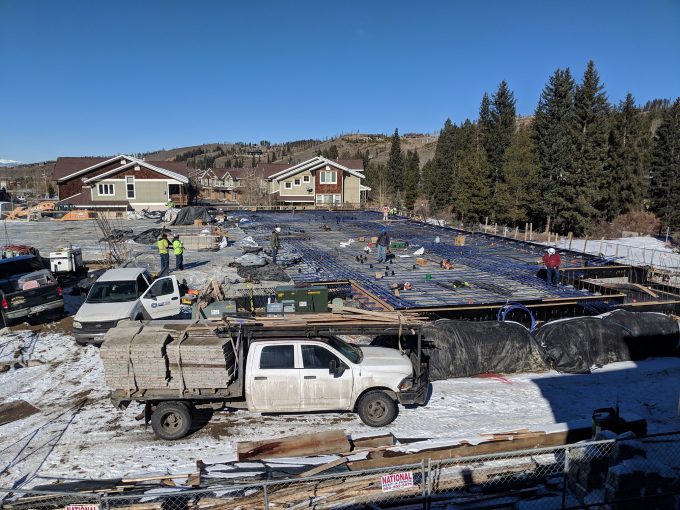
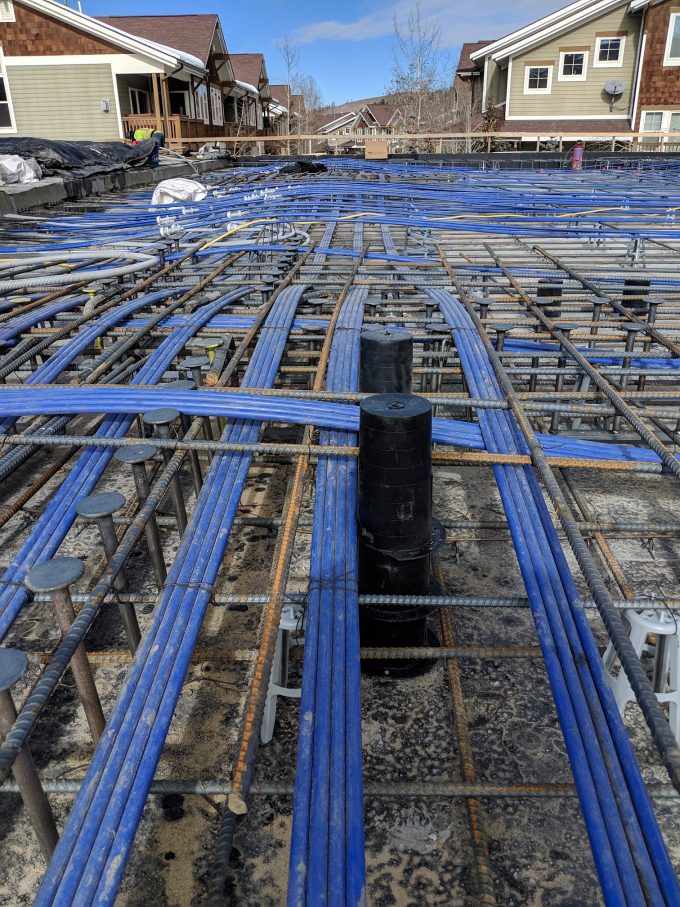
Below is an image of the concrete podium in all its magnificent glory. Given its size (about 15,000 SF), the slab was constructed in two pours. To the left, you can see the first pour, while the second to the right has yet to be done.
Now, the break in the pour needs to be chosen carefully. Essentially, we want to place the cold joint so that the tendons passing through it are at mid-depth of the slab. I like to visualize the reason for this simply by relating the steel tendons that will be tensioned to a string. Imagine holding a string (one end in each hand) and giving it some slack. The string sags due to gravity, but when you pull on it (or tension the string) it will straighten out. By draping the tendons (see below) and tensioning them, the tendons will want to straighten and will transfer the induced forces to the slab. Simply put, when a portion of a tendon is below the slab’s neutral axis it will push the slab up, and vice-versa. If the tendon is at mid-depth, it will do neither, which is precisely what we want in this section.
The cool thing about PT slabs is that they shrink over time (typically on the order of a few inches). Because of this, we need to give the slab the ability to do so for about two months. Otherwise, cracking will most likely occur. Just as well, the longer or wider a slab is, the greater its ability to shrink. To help avoid unnecessary cracking or damage to the slab, slip connections can be detailed that give the slab room to move until it is ready for a committed relationship. Side note, for slabs with longer dimensions (about 200’+), the decision to use a closure strip may be made (more on this in a later entry).
Let us use an example at a perimeter support. For this project, we have concrete walls at the perimeter and are using many of them as shear walls. But, to use these walls for shear strength, we need to connect the slab to the wall. As we just described above, this is a problem in the early stages of a slab’s majestic life. One solution is to sleeve the reinforcement before concrete is poured (see the green tubes below).
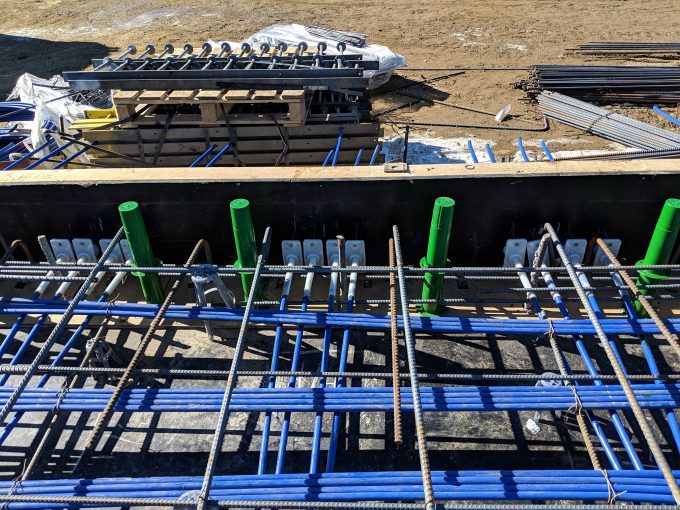
By doing so, a hole will be created around the rebar to allow the slab to move as needed. Once an approved time period has passed, the sleeves can be removed, and the holes can be grout filled to create the “hard” connection required for load transfer.
These are just a couple of design considerations that must be taken into account. We will continue to look into others in another post. Know that the next blog post will discuss a completely different project. And to build the anticipation that you undoubtedly have, you’ll have to wait to find out which one.