
Revit 2026 View Positioning: A Small Feature With a Big Impact
Revit 2026 shipped plenty of headline features. View positioning was not one of them. Yet this quiet addition may do more for your drawing sets than any modeling or automation tool released this year.
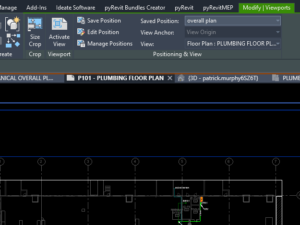
Autodesk calls it View to Sheet Positioning and Automated Placement. You’ll find it on the Positioning & View panel under the Modify | Viewports contextual tab. Whatever you call it, the payoff is the same: plans, sections, and details that land in the same spot on every sheet.
What Saved Positions Actually Do
The tool lets you save, revise, and manage view positions on a sheet. Assign a saved position to a view, and Revit remembers it. Apply that position to similar views, and they align across the full set.
Better still, views sharing a position move together. Nudge one, and the rest follow. You can also choose a view anchor — view origin, center, or any corner — though anchors other than View Origin require a supported, enabled crop region.
Swapping views is safer now, too. Replace a view on a sheet and the saved position assignment holds.
Why Sheet-to-Sheet Consistency Matters
Consistency is the real win here. When views align, flipping through a planset feels intuitive. Reviewers compare floors, disciplines, and phases without reorienting themselves on every page.
Nobody praises a well-aligned set. Everyone notices a sloppy one. Contractors, plan reviewers, and project teams move faster through documents that behave predictably — and that speed often shows up as fewer questions during review.
Coordinating Across Disciplines
Multidisciplinary projects raise the stakes. Whenever possible, sub-disciplines should match the architect’s sheet layouts. A unified layout across architectural, mechanical, electrical, and plumbing sheets makes cross-discipline review far easier.
One limitation to plan around: saved positions do not transfer between Revit models. Neither Copy/Monitor nor Transfer Project Standards carries them today. Until Autodesk adds that capability, coordinate layouts manually during project setup — ideally in your working templates. Ten minutes there keeps every discipline aligned for the life of the job.
Working Before 2026? Use Guide Grids
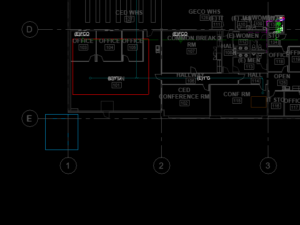
Teams on earlier releases can still get consistent placement. It simply takes more hands-on work. Add a guide grid from the View tab, on the Sheet Composition panel, then reuse that same grid across every sheet of the same size.
Think of it as a little blue friend that travels sheet to sheet, marking where views belong. Guide grids don’t print, so you can leave them on throughout production. Toggle them per sheet in the Properties palette — or select multiple sheets in the Project Browser and assign one grid to all of them at once.
Guide Grids Still Earn Their Keep in 2026
Guide grids won’t give you the centralized control of saved positions. They remain useful anyway. Our teams use them as a back-check on saved positions, particularly in this first release, where behavior can be inconsistent. Set up a grid for each standard view position and you have a visual reference to verify against.
Small Details, Better Deliverables
Aligning views sheet to sheet takes very little effort. The return is a cleaner, more readable, more professional set. Whether you rely on Revit 2026’s saved positions or a well-built guide grid, that discipline changes how your project reads to everyone who opens it.
Sometimes the biggest improvements come from the smallest details.
EVstudio coordinates architecture, engineering, and planning across 12 in-house studios — which means our BIM standards have to hold up across disciplines on every project. Talk to our team about how we build and document your next one.
Sources
- Autodesk Revit 2026 Help — View to Sheet Positioning & Automated Placement
- Hagerman & Company — Revit 2026 Tip: Automate View Placement with Saved Positions
- ASCENT — Using Revit Sheet Guide Grids to Simplify Your Construction Document Creation
- AECbytes — What’s New in Revit 2026


