Part 7 – Framing, Trusses, Walls, Weather Proofing…and Family
Trusses and Lumber
During the development of the plans, I started pricing lumber and trusses to ascertain a budget. This also allowed me to review truss and lumber companies where I could value engineer or adjust my plans for better pricing. This included looking at different floor joist spacing and depth, comparing scissor trusses to standard trusses, ensuring that we were landing on proper stud lengths to ceiling heights and other minor design components. During the permitting process, the price of lumber was skyrocketing because of the impact from the flooding in the Southern US and material demand, thereby making it difficult to balance the decision of purchasing materials early to meet our budget or waiting to ensure it would fit the design. My lumber company agreed to honor their pricing for 30 days, so at each 30-day mark, I reviewed pricing to see if it was worth moving the purchasing of materials up to save costs. Luckily, there were no comments from the county building review team on the plans that changed my plans significantly.
Windows and Doors
Windows and doors were more forgiving with price fluctuation than the lumber. I reviewed standard sizes to make sure I could choose the product from a variety of manufacturers and then placed my window order later in the process once I knew I was four weeks from installation. An important piece of the decision-making process was trying to balance cost while still choosing a product that met our needs in terms of what I wanted the windows to provide, which included: protection from UV, window quality, insulation value, and style. Garage doors were also a piece that I was willing to pay extra for since they would cover a large portion of the front face of the building. I would also need the garage doors to hold heat because we were heating the mother-in-law space above, which factored into my decision to spend more of our budget on this detail. I chose to use three separate garage doors so there would be smaller openings when they were open and less cold air would pass through.
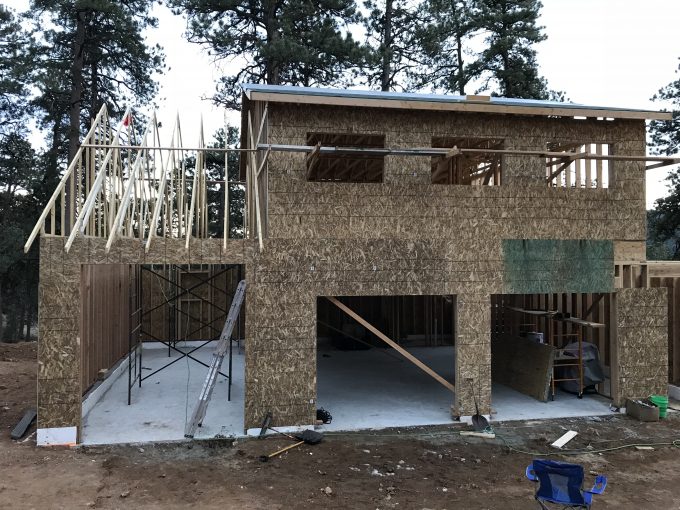
Walls and Trusses

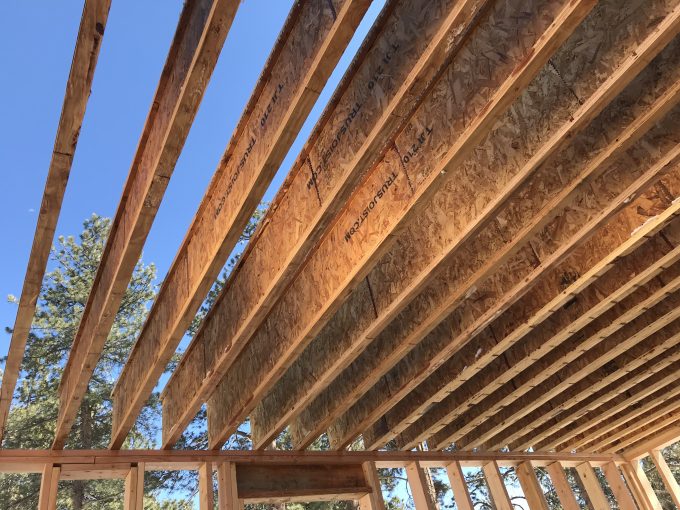
I mentioned my cousins in Part 6, they own a construction company together, and we had always shared labor when one of us was building. Once the slab was poured and materials were on site, I knocked out a few of the first-floor walls and then had them come out for four days to help frame the structure. In 4 days, we finished the first-floor walls, set second-floor joist and sheathing, framed and sheathed second-floor walls, set roof trusses, and finished sheathing on the roof. We also didn’t have any equipment, so we manually raised all the walls and trusses. It was a busy four days, and we were all beat by the end. In addition to the exhausting manual labor, my cousins were able to see the full range of Colorado weather, with the first two days only warming up to the teens, which had us fighting frozen compressors and hoses and using a small fire to keep things warm, but by the end it was sunny and mid-40’s, which kept us moving.
Framing and Sheathing Permits
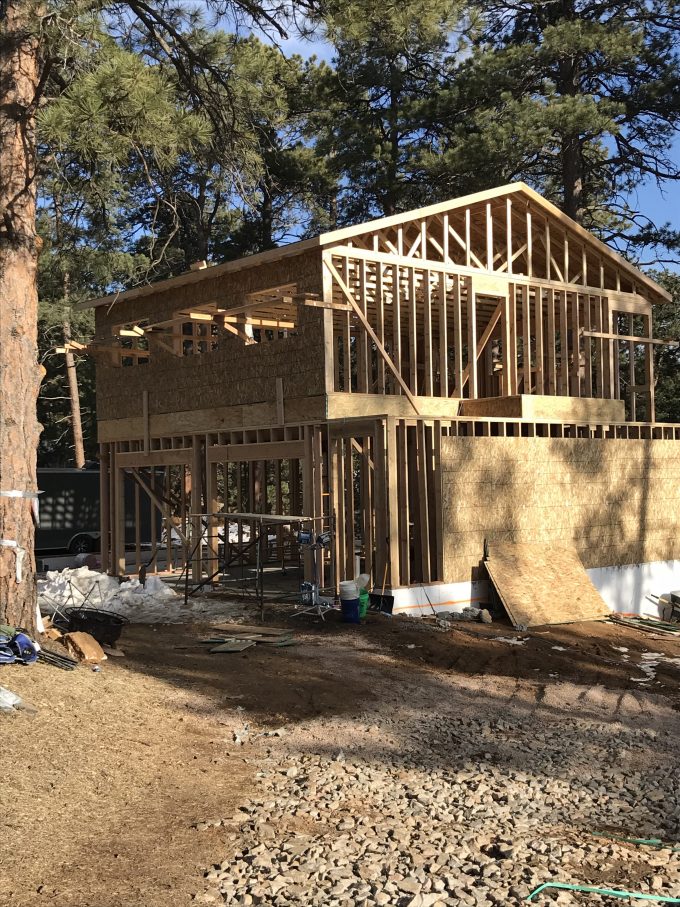
Once my crew was gone, I plugged away wrapping up the loose ends before my inspections for framing and sheathing. I double-checked my nail spacing, added some ply to small areas that we skipped, and fastened my trusses to the top plates (I was quick to buy the long truss lags instead of nailing my life away with old-school hurricane clips!). Naturally, after reviewing all of the sheathings, the inspection was over in a minute, and I realized I might have been a little paranoid.
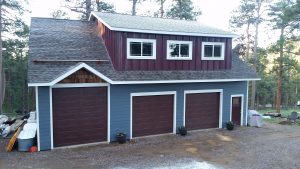
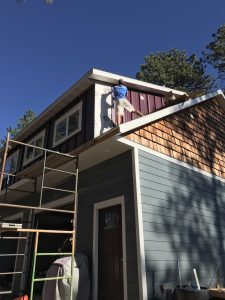
Wrap, Shingles, and Siding
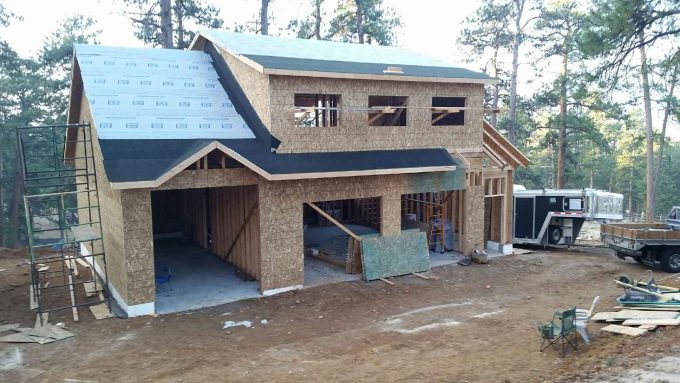
Once the permits were approved, we started a handful of next steps simultaneously, including exterior waterproofing, electrical, HVAC, plumbing, and more. The first step was getting house wrap placed around the walls for the exterior waterproofing and shingles on the roof. The most challenging aspect to waterproofing and roofing is that all the details need to be done in the correct order, so once the house was wrapped the soffit and facia were done before the shingles. I also needed to start making decisions on color, style, and looks! Although I looked at metal sheet-style roofing, metal shingles, and asphalt shingles, I relied on what I knew best and what I knew I could get done quickly on my own and do quality work in, which ended up being asphalt shingles. The windows were set shortly after, and at this point, I had a fairly water-tight structure. I would also continue siding for the next five months when it fit into the schedule. The siding materials included cement-board siding, raised metal seam siding, and cedar shakes. We wanted to balance the look and colors we wanted (low maintenance strong colors in cement board and metal seam) with the wood tones of our neighborhood and mountain area (wood colors and textures).
With the water-tight structure in place, we continued pushing forward on electrical, HVAC, and plumbing. The grind over the next month or two would push my patience!
If you would like to review the entire series Click Here, and search for Designing A Dream, Building A Mountain Home, All Under One Hat.