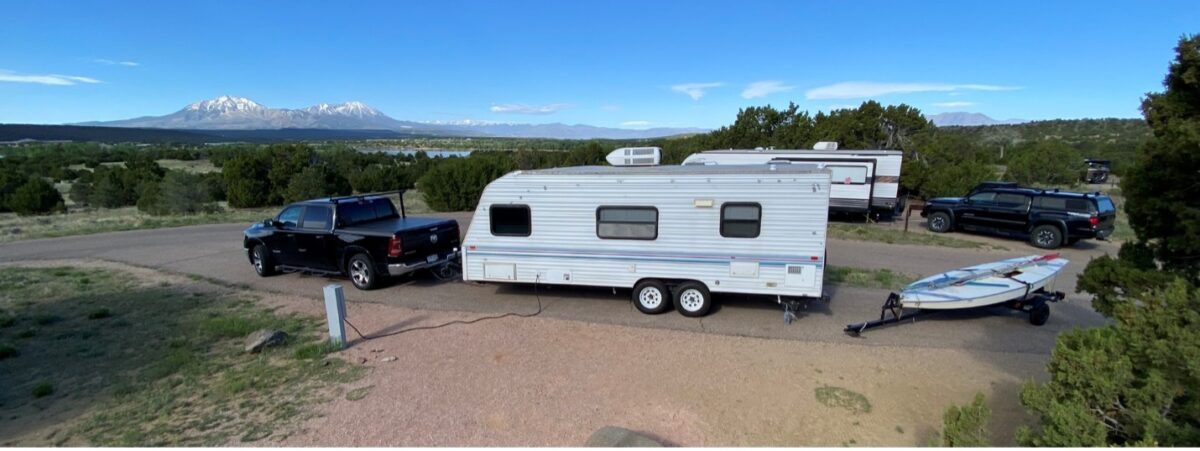
Last summer, with COVID-19 concerns and social distancing still a major factor in making summer plans, I made my first Facebook Marketplace purchase: a 1997 camper that I felt like I practically stole for $3,500! Although the interior was in relatively good shape for a 20-year-old+ camper, it did need some exterior work. I immediately replaced the tires and installed a backup camera, then headed out for my first trip.
I set up along Trinidad Reservoir and had no more than leveled the camper and disconnected it from my car when the rain started to come down by the bucket, followed within a few minutes by my own interior water features! Luckily, the rain stopped after a typical 10 or 15-minute Colorado deluge, and I didn’t have to worry for the rest of that weekend. I took the camper home, climbed up on the roof, cleaned it, and discovered that the original EPDM (ethylene propylene diene terpolymer membrane) roofing material, although appearing to be ok at first glance, had basically disintegrated over the years. The original white color (discovered during this cleaning process under some sealant) had completely disappeared and been reduced to a paper-thin, sheet of the first layer of rubber covered in black rubber dust. I also found a few small tears and holes, then made a big tear when my knee went through a section of the roof where the plywood had rotted due to water intrusion.
Patching clearly wasn’t going to be an option. It was time to replace the roof.
With a significant amount of other projects that needed my attention, I taped plastic over the roof and my parents were kind enough to let me store the trailer indoors with them until I could fix it. Fast forward roughly a year to about mid-May, about two weeks to Memorial Day weekend, when I found the only open camping spot at my favorite campground in Lathrop State Park. I immediately booked the spot, then had a moment of panic realizing that I had managed to put off my roof replacement!
Replacing a roof of any type and any condition isn’t exactly cheap. If there are structural issues (like a rotten roof deck) it may be even worse. Based on my research, I was looking at a bill of anywhere from $3,000 to $6,000 to re-roof 128 square feet! I decided to take this project on myself, and enlisted the help of my brother, sister-in-law, and my dad to replace the roof. My mom also gets a big honorable mention for helping clean out the interior after we tracked some of that nasty black dust I mentioned inside.
This is where the process will become a little more pertinent to replacing the roof on a building, RV, tiny house, dog house, or anything with an EPDM roof.
If you have an EPDM roof that is leaking, you may have a few options to fix it: If you can find the source of the leaks and the roof membrane/structure is in generally good condition, you may be able to simply patch or seal the leak. There are a number of different patch kits and products available to perform this type of work yourself.
The next level of escalation is a roof with lots of leaks and tears, but the structure is still in good condition. In this case, you may be able to clean and coat your EPDM roof with a silicone or foam product made for this exact purpose.
If you find yourself with a roof in bad condition and can identify portions where water intrusion has compromised the structure, you may need to go for the “nuclear option” like I did, which means almost total replacement. In my case, I took the following steps:
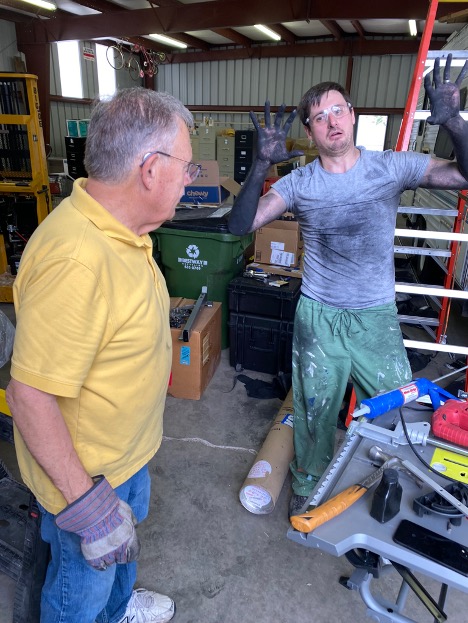
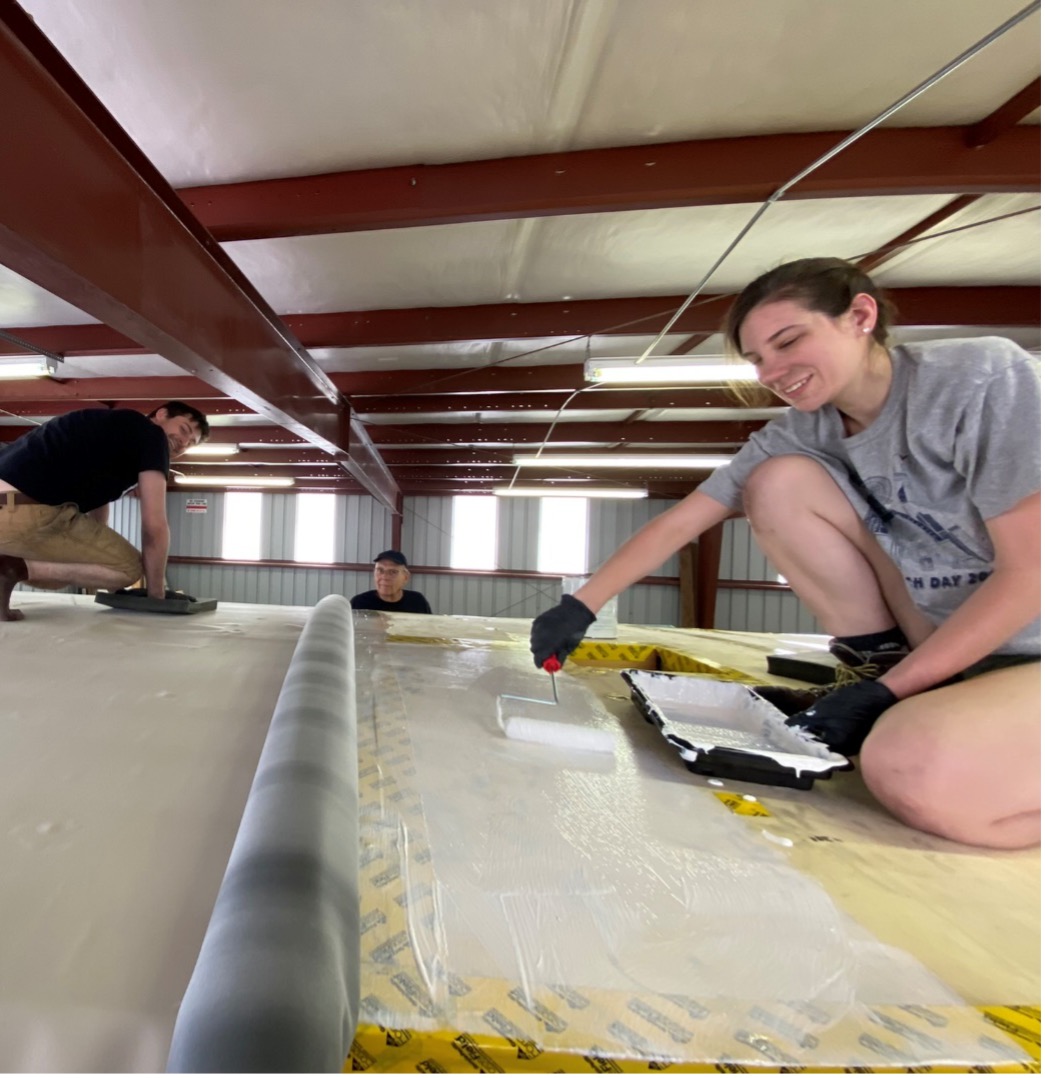
DISCLAIMER: There is a photo below that only slightly exaggerates the messiness of this project. In the spirit of not scaring you away, I should let you know that there was a much cleaner way to accomplish the task that my brother was performing. However, he decided to go about it in a manner different from my recommendation, which resulted in the photo.
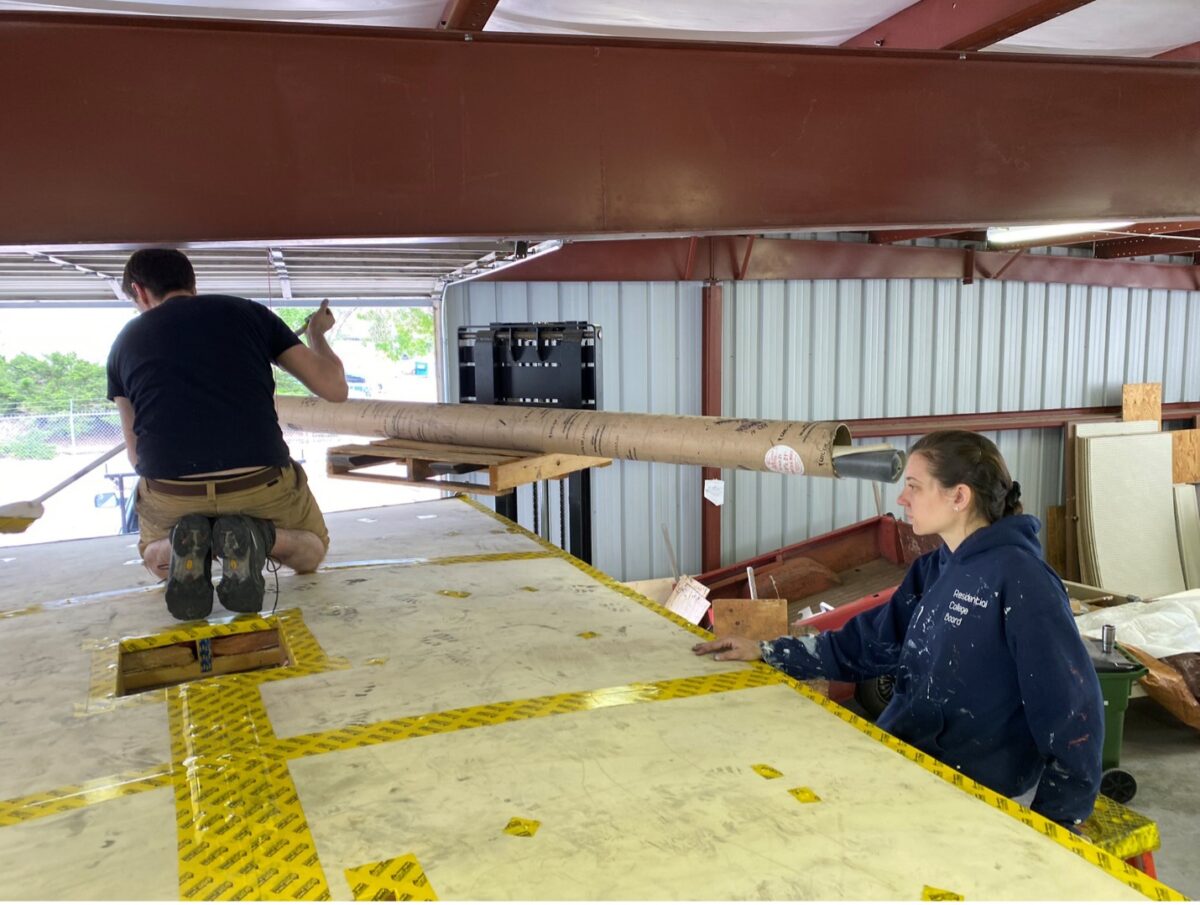
- Remove all of the roof penetrations (AC unit, roof vents, plumbing vents, refrigerator vent, and a skylight over the shower).
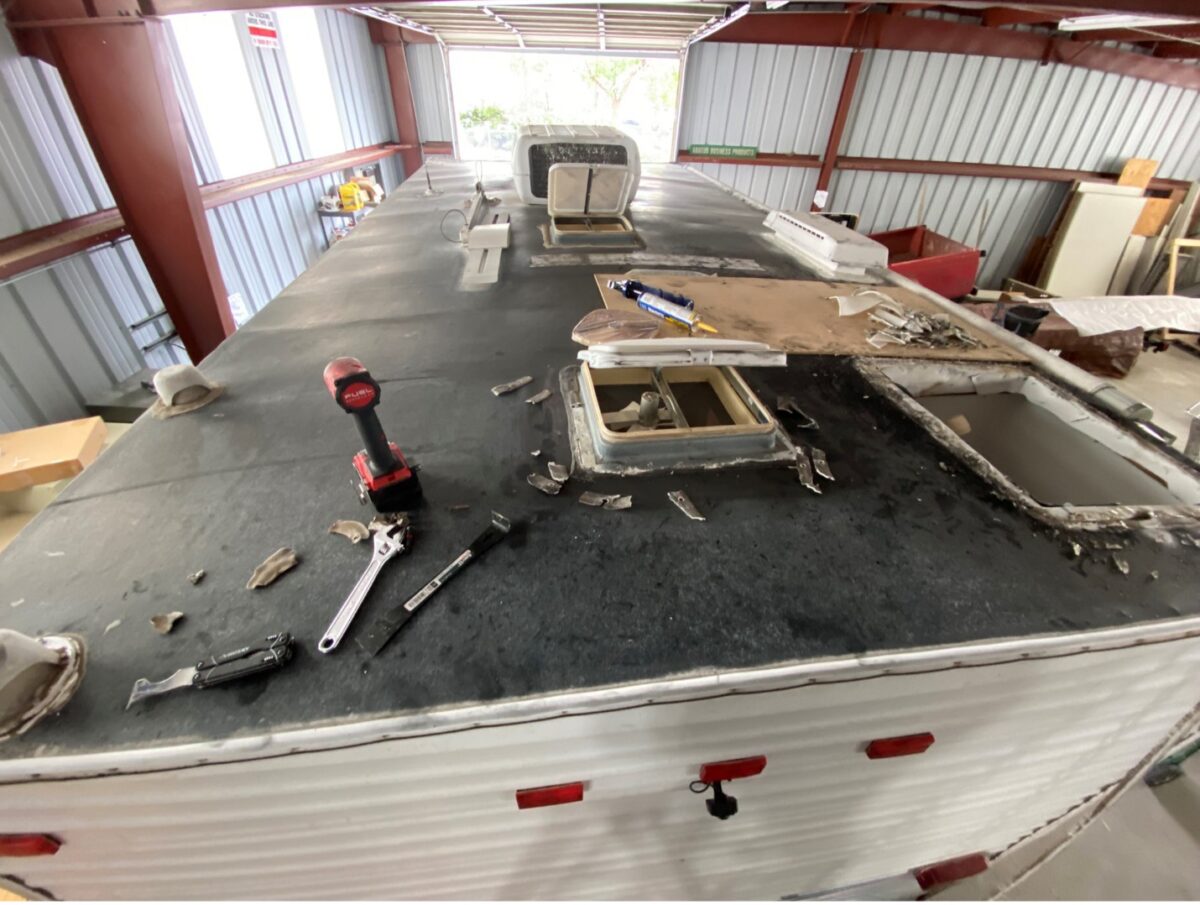
- Remove all of the termination bars (this applies to both buildings and RVs) and clean off any sealant or Butyl tape (I re-used the termination bars, but on a building, you may need to replace them, along with any flashing that gets damaged or has deteriorated).
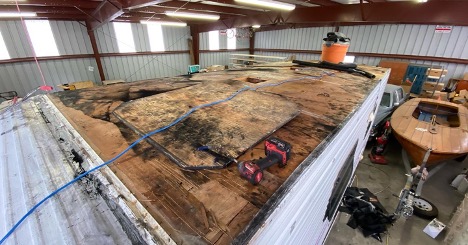
- Remove the old membrane. Your existing membrane is probably glued down to roof decking such as plywood. If you have to pull it up, I would recommend pulling it “with the grain” in smaller strips (roughly 2’x4’) to limit the splinters of plywood that will likely to come off with the membrane if you pull it off perpendicular to the grain. This was an extremely dirty part of the project, as the “black roof dust” gets on EVERYTHING and will remain there, possibly permanently. Make sure you wear clothes that you can throw away, and don’t schedule any important social events for about the next week.
The aforementioned “chimney sweep” look. - Clean off the roof decking and evaluate it for rot/areas that need to be replaced. In my case, I really only had one very bad section of roof. The original roof on my RV was also ¼” plywood, so I elected to fasten new sheets of plywood over the original plywood with flat headed screws at the supports. I feel a lot better about having a ½” roof than a ¼” roof! It adds a little weight to the RV, and I still have to be careful about only putting my weight on the supports, but I am a lot less afraid of going all the way through it!
- This will probably apply to certain building roofs, and definitely RV roofs, but I then removed the extra plywood overhanging the RV by about an inch on all sides and cut holes for all of the roof penetrations by using a plunge router with a flush trim router bit (the bits that have a bearing at the tip so that you can follow an existing profile) to remove the extra material.
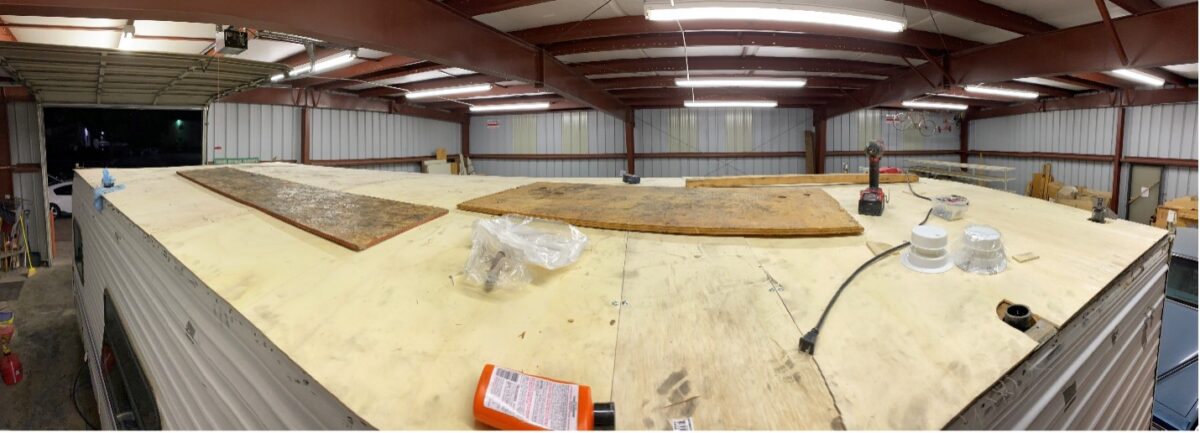
- Depending on the manufacturer of your new roof membrane, you may need to tape over the screws and seams or apply felt. My membrane didn’t come with instructions that were specific about this, but, being an architect, I wanted to have a self-adhered flashing at all seams and at the edges of the roof, as well as over anything that could damage my new membrane. I used GP Forcefield tape (I’ll admit that it might not be the entirely correct product) to cover my screw heads and around the entire perimeter of the roof for this purpose. Note that the new roof membrane did not adhere to this tape, so you don’t want to use more than you need, but it should be good for protecting the new membrane from the edges, seams, and screw heads. I also installed some thicker metal plates where the air conditioner had previously caused a ponding problem on the roof, and taped over those plates.
- After all taping/flashing is done and the roof has been cleaned and prepared according to the manufacturer, you can glue down the new roof membrane (or fasten it however the manufacturer recommends attaching it). I then put my family to use. Two of us managed the roll of EPDM roofing, which we applied from the front of the trailer to the back of the trailer about a foot at a time, with my sister-in-law applying the glue in about 1.5’ applications across the width of the trailer, while my brother worked out bubbles in the membrane after it was glued down.
The crew hard at work. - I’m going to skip the portion about cutting out and reinstalling the roof penetrations since building penetrations are generally flashed and waterproofed much differently from RV’s and I don’t want to cause confusion. For this part of the project, you should check with your membrane manufacturer.
- Finally, after the new EPDM roof was glued down, I re-applied the termination bars which becomes a sandwich of flashing, butyl tape, the new membrane, and termination bars (according to the manufacturer) and then used a knife to trim the excess membrane extending beyond the termination bars. I also used some roofing tape made specifically for RV’s which I used to lap over the front-facing interface between the metal siding of the camper and the new membrane/termination bar.
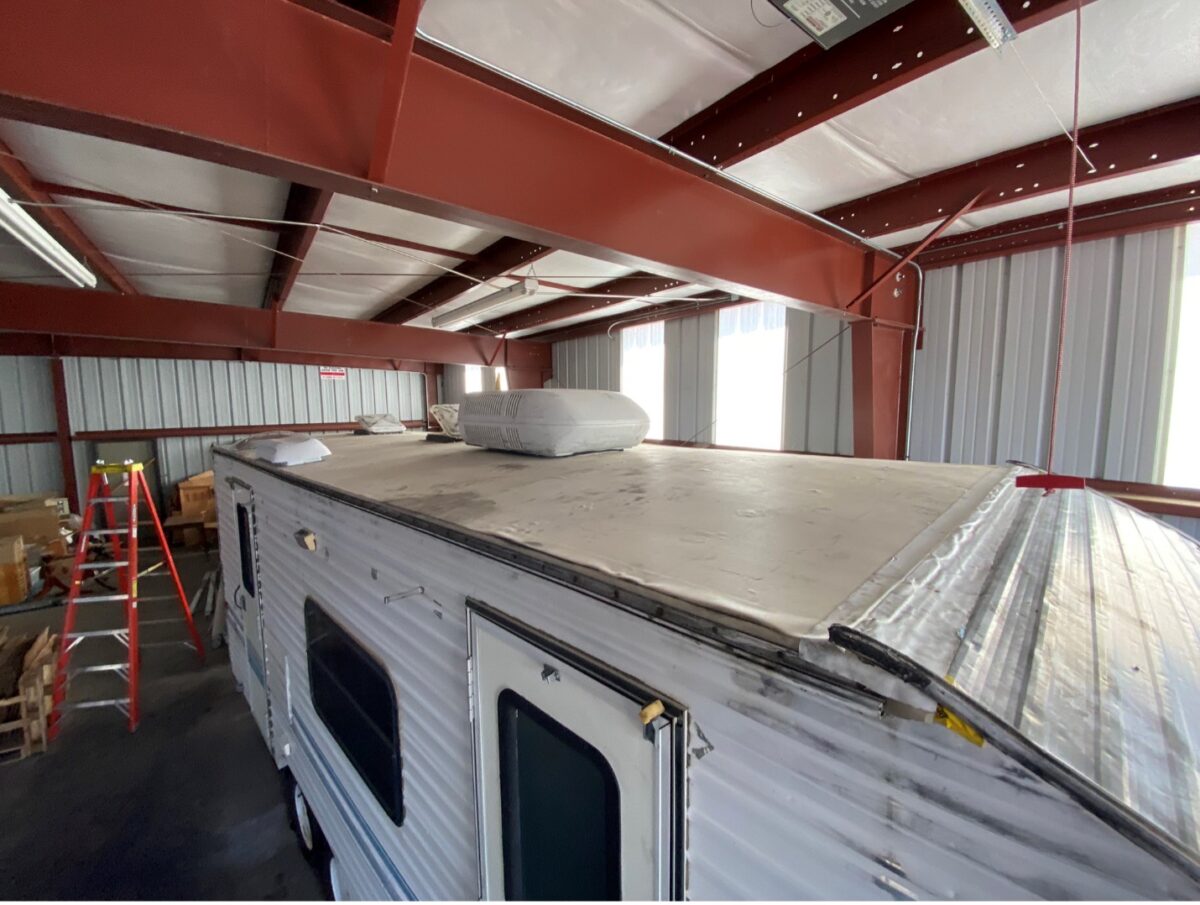
The completed roof in all its glory.
All in all, the project cost me about $1,000 ($750 for an overstock 9’x20’ roof membrane that my local trailer store had received by mistake and sold to me apparently slightly above cost, and $250 worth of miscellaneous sealants, fasteners, and new roof penetration supplies) and about 40 man hours. Admittedly, if we did this type of project all the time, we probably would have been faster about it. Considering we did this in about 2 days, I think we did ok. I still have a few loose ends to wrap up on it, but I took it to my favorite park with my brother and sister-in-law for Memorial Day, where it survived a brief over-night rain storm and sustained high winds and gusts, so I think I will be ok!
My final conclusion is that fixing or replacing an EPDM roof isn’t a particularly difficult or complicated job, but it can be very labor intensive. If you are thinking about replacing your own roof, you may want to consider hiring somebody that can do it correctly and also can get your installation warrantied. If you need structural or architectural assessment of your roof, EVstudio can help you make an informed decision and can also provide waterproofing and repair details.