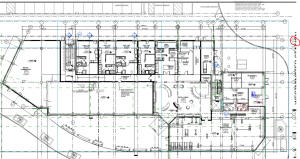
Recently, EVstudio began work on a 500+ unit multifamily project spread over 6 buildings with 2 parking garages. Given the size of the project, it was no surprise that we determined early on that we would try to do what we can now to prevent headaches later on down the road. The task I was involved in was to see if I could find out a “Goldie Locks Zone” for Revit file sizes, where the size of the project in terms of MBs isn’t too much that it bogs down performance and graphics. As a result, I was able to come up with some do’s and don’ts when it comes to keeping a Revit file size manageable.
Do
- Regularly purge your file. For this particular project, we have decided to do this on a weekly basis. Purging your file will remove unused families and views. This keeps the project from saving and storing files that are not getting used for the project itself. It is recommended that you archive a copy of your file before doing this to ensure nothing gets lost at any given stage.
- Audit your file(s) on a regular basis. Auditing a Revit file runs a process that scans and detects bad or corrupt families or templates. Think of this as sending your file to the doctor for a check-up. For this project, we determined that it will be done on a weekly basis. My recommendation is that is a minimum. As the project progresses it may be determined that an audit could be useful even more often than that.
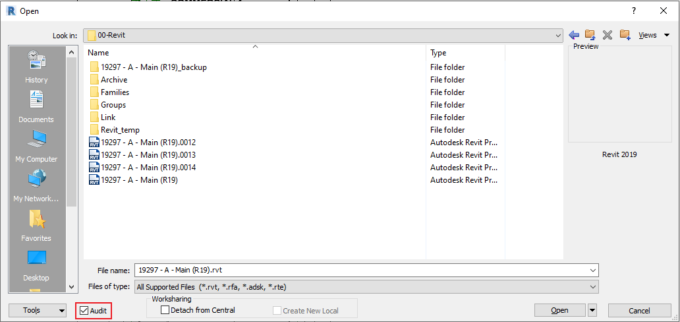
Select “Audit” when opening to run maintenance - Limit the number of groups you use. Yes, the walls, windows, families, etc. are going to be in the model regardless but by grouping elements, you are giving one more process that Revit must run in the background. Eventually, it could catch up to you if you overuse groups. There is obviously a dance that must be done between making your life easier as a modeler and keeping the program moving efficiently.
- Occasionally detach and resave central models. This task impact on your model is dependent on the number of backups that you allow Revit to keep. By detaching and resaving your central model, you are erasing those backup files and essentially starting over. As your model grows in size, so do those backups. If you only task Revit with holding onto let’s say 3 backups, the boost in performance you can expect to see will be less than if you had a Revit file that was tasked to hold onto 15 backups.
Don’ts
- Ignore warnings. Unlike errors that force you to pick an action, warnings typically pop up in the lower right of your screen and are blown by without regard to what they say or the implications they may have to other elements. I will be the first to admit that I myself do just this and did for a long time. Although these warnings won’t always impact what Revit outputs, warnings are stored in the background and increase the file size which can easily result in a slower, clunky-er model to work in. Although you shouldn’t feel the need to tackle each and every warning that comes up it may still be a good idea to periodically check in on your warnings and resolve the ones that are quick and easy to fix. There are two ways to access the warnings that have been stored and are awaiting a response. First, you can select the desired element(s), and if those elements have an associated warning, under the modify tab you will be able to click “Show Related Warnings”. This will show the warnings associated to only those elements. For a more project-wide approach, travel to the Manage tab and on the right side of the options you will find the”Warnings” button in the Inquiry category.

For a project-wide approach, click this option 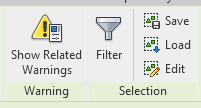
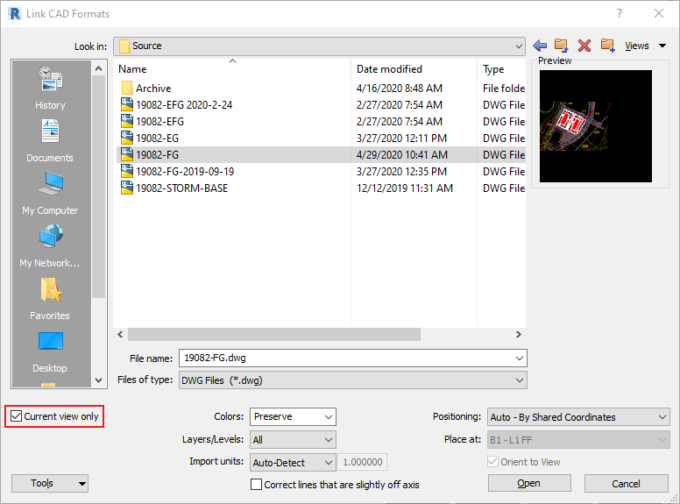
For a more focused approach - Blindly link CAD files. By this I mean, do you really need that site plan to show up in every single possible view? Be mindful when linking in CAD files. If you believe you will only need that site plan file to only be on your site plan sheet, it is probably a good idea to link the file to your current view only. This can be done by checking a box called “Current View Only” that is on the dialog box that appears when linking in a CAD file. Another possible alternative is if you have 1 specific working view set up that all your CAD files are located until you realize you need them to start showing up in other views.
3. Constantly join elements. I know joining elements can make things appear cleaner or more correct in 3-D or other views but it is not always in your best interest. Not only can this result in more warnings when elements get unjoined for various reasons, but it can also slow down the performance of your file. By constantly joining all of your elements you are in turn giving Revit another task to constantly run in the background when going from window to window. My recommendation would be to leave things unjoined as long as you can. Typically, it’s during the Construction Document Phase that I might begin to join elements as needed.
4. Forget about your Revit families. With so much attention given to the overall file size and the processes that can be done to help mitigate a ballooning file size, it can be easy to forget the elements themselves. Our office has not been blessed with a designated family creator so it falls on the drafter’s shoulders to get the appropriate families needed for the project. There are open source websites like revitcity.com or bimobject.com that can be great for quickly downloading families but keep in mind these families are sometimes modeled by amateurs or beginners. This tends to leave a bit of room for improving the families. Doing similar purges and audits for the individual families can make a good impact on the performance of the overall project, especially if that family was used 50 times over.
In short, I just recommend being mindful of the various ways you can add complexity to your file. Don’t agree to Revit’s pop-ups just to get rid of them. Read them and understand what it does in the big picture. Does having the floor cut out overlapping portions of walls make sense and help you in any way? If it doesn’t immediately make sense think about skipping those so you don’t compound the number of tasks you ask Revit to perform every time you change a view. Additionally, taking care of your file and running regular maintenance on it can yield dividends in the long run. Having Revit load a view 3 seconds faster may seem menial, but eventually that 3 seconds will become 5 seconds and later on those seconds could add up to wasting 15 minutes in 1 day just waiting for Revit to load your views.
Interested in more Articles on Revit? Click here for more helpful tips.