Revit can be an architect’s best friend, and occasionally an architect’s biggest nemesis when you can’t get it to cooperate. A common problem: mysteriously appearing or disappearing objects in a view. One solution to that: temporary view properties.
A typical scenario in Revit is to have a sheet view for construction documents that is intended to show a very particular set of information. Then you or a coworker decide to turn things on and off in that view to see how objects line up, or to uncover something that might be hidden under another object. Instead of using a working view, you change something’s color, maybe turn something else off, and turn on all the layers in a cad link. By the time you’re ready to print, you’ve lost track of all those changes to your settings. The print view is all messed up, and it’s a total nightmare to get all the adjusted and forgotten settings ferreted out and changed back to how they should be for print.
Best practice is to have a coordination or working view for these types of comparisons. But if it’s just a quick check or you don’t want a working view for some reason, you can use Temporary View Properties to make all those changes to your heart’s desire, and then with one click put it all back the way it was – your beautiful clean plan.
To illustrate how I use Temporary View Properties while I work in Revit, I’ve taken some screenshots, shown below, to help users unfamiliar with this function learn how to use it and what it looks like in practice.
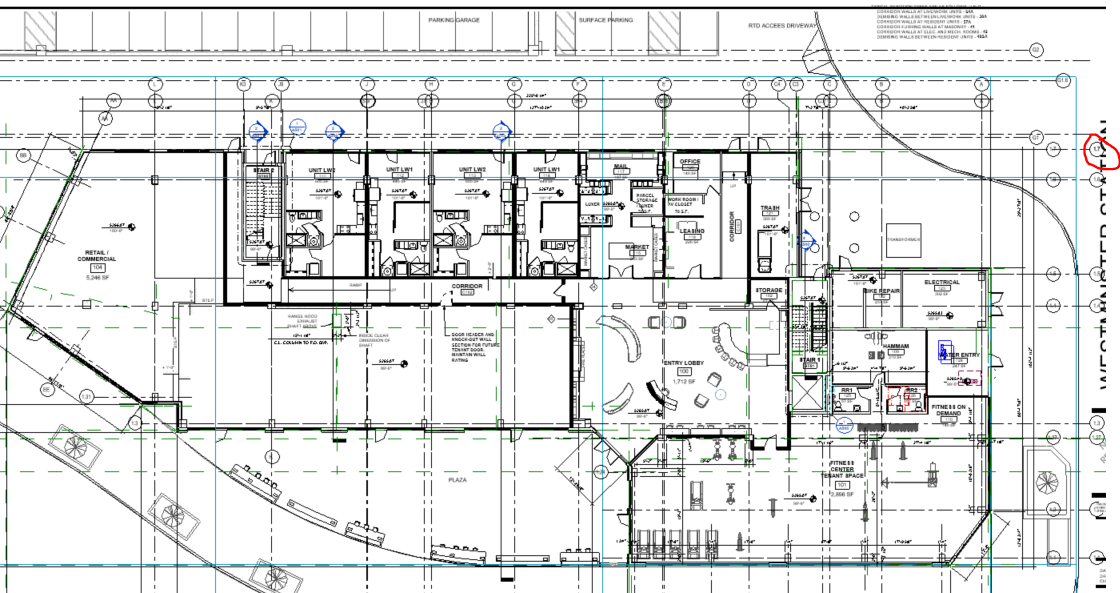
This first image shows extra grid lines from a linked model. The red circle indicates an extra grid line that is also overlapping part of the title block. The link should be off in this view, but a coworker turned it on to the check alignments of various objects in the link, including to make sure the gridlines line up. As-is, this view is not printable due to this overlap.
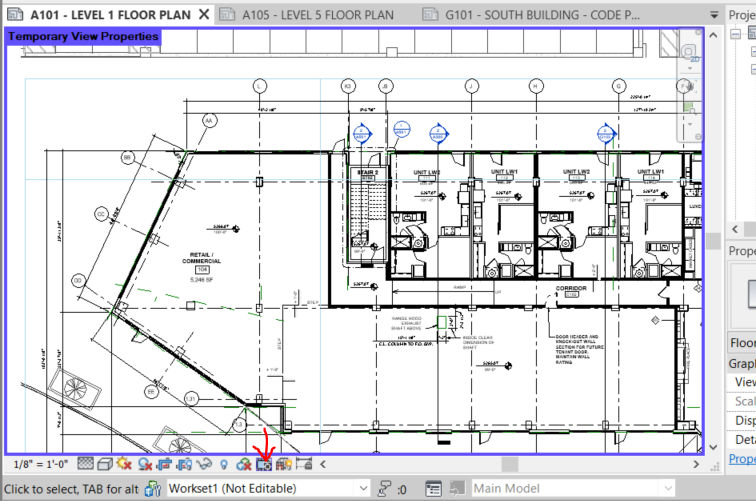
This second image shows the Temporary View Properties button (red arrow pointing at button) – it looks like a tiny app window. Refer to image 4 below to see what the pop up window looks like. Check the box labeled “Enable Temporary View Properties” to start. (The above image also shows the purple outline around the working window, reminding you that you are in a special mode.) Proceed to make changes via Visibility/Graphics Overrides (shortcut “VG”). (Examples of actions include turning things on and off, changing colors or line types of objects, hiding things, showing shadows in elevations, etc.) Temporary View Properties only controls visibility settings however, so if you change things like the shape of a crop window, or move a modeled object – that change will be permanent and you will have to remember what you did to change it back.

The third image shows the Visibility/Graphic Overrides (VG) window where you change the settings listed above. It’s important to note that outside of the temporary settings, these changes would be permanent, and would have to be manually changed back individually to print.
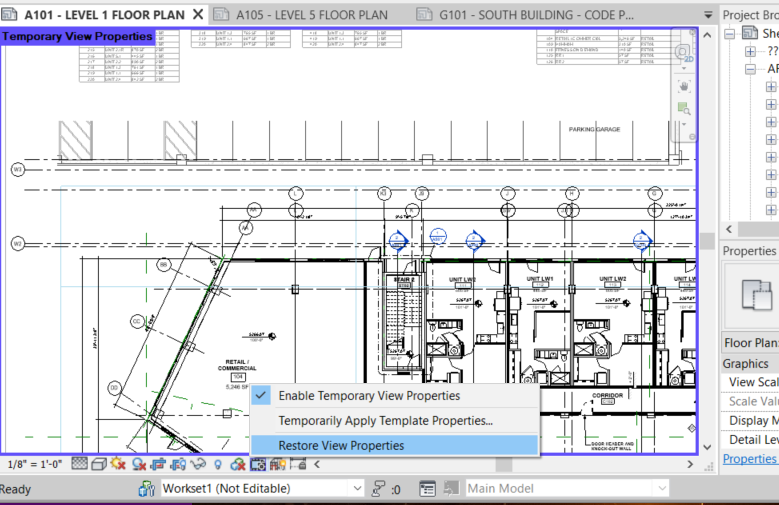
The fourth image shows the “Restore View Properties” option in the pop-up when you click the temporary view properties button again. This resets all the visibility changes back to where you started, so you don’t forget to reverse a change and mess up your print view. This saves a lot of time.
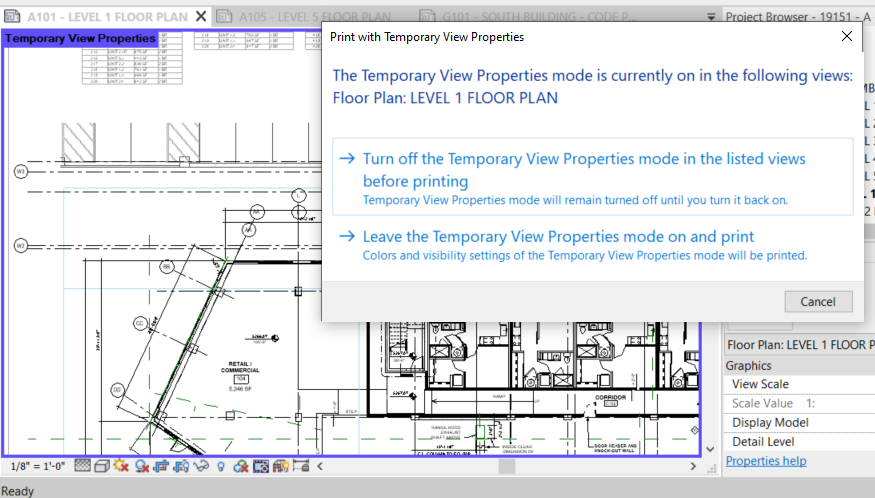
This final image shows the pop-up warning you get if you print without turning off the visibility mode. You can choose to leave the temporary settings on or reset them at this time.
Using this tool isn’t a catch-all for the user error issues someone might run into with Revit, but it has saved me a lot of time and hassle, and hopefully it helps you, too.