ADA clearances are an important consideration for architects and can be required for many different elements. Some Revit users will draw detail lines for the clearances which are separate from the family. Inevitably, the family gets moved and the details lines are not moved with the family. This is a cue that you should consider including the details lines in the actual family. Of course, clearances can vary depending on approach and other factors. One solution is to simply allow the clearances to be turned on/off as an instance parameter. Clearance lines should also be created under a separate object style so they can be turned on/off through Visibility Graphics. The example below shows how this can be done for a door family. Other families to consider including clearance lines on could be washers, dryers, sinks, drinking fountains, toilets, etc.
1. Open a door family and go to Objects Styles under the Manage ribbon. Create a new object style called “Clearance Lines” and click ok. We usually make ours red, dashed lines.

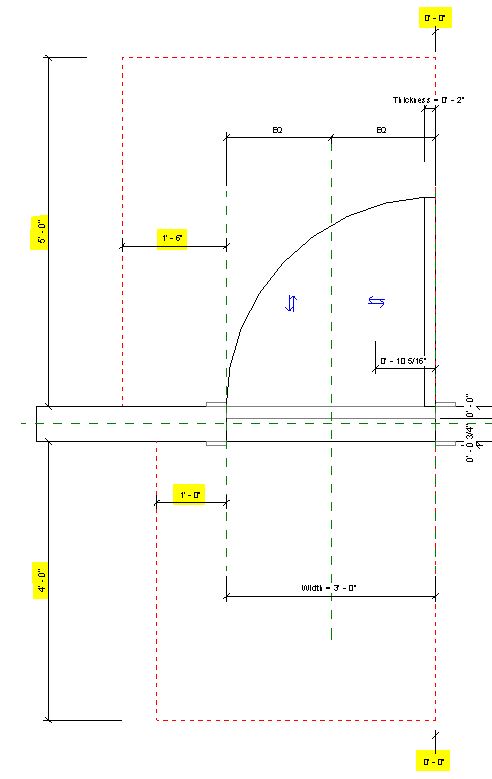
2. In the family plan view, draw your most commonly used clearances as symbolic lines and use the Clearance Lines object style. For a door family I will use the forward approach clearances of 12” on the push side and 18” on the pull side. Make sure that your clearance line locations are dimensioned and locked as appropriate so they will move according to door size.
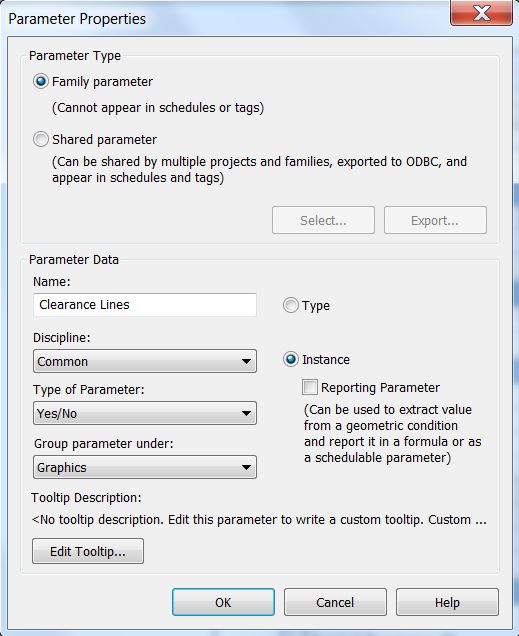
3. And what if this door has to be used for a side approach and these clearance lines are no longer valid? Make the clearance lines controlled by an instance visibility parameter so users can turn off the lines for a particular instance. Then they can draw in the clearance lines in separately for that instance. First add the family parameter shown below.
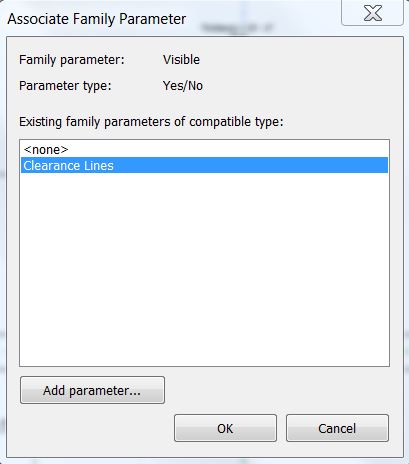
4. Then select the clearance lines on your plan view, and while they are selected click on the button beside the Visible property.

Then select the Clearance Lines parameter that you just created and click ok. This will associate the visibility of the clearance lines with the yes/no parameter you just created so users can turn on/off the clearance lines for a particular door instance.
5. Finally load the family into your project. You can now turn off all clearance lines in a view by deselecting Clearances Lines under Doors in Visibility Graphics. Additionally, you can select the door and uncheck “Clearance Lines” in the properties to turn off the lines for one door instance.
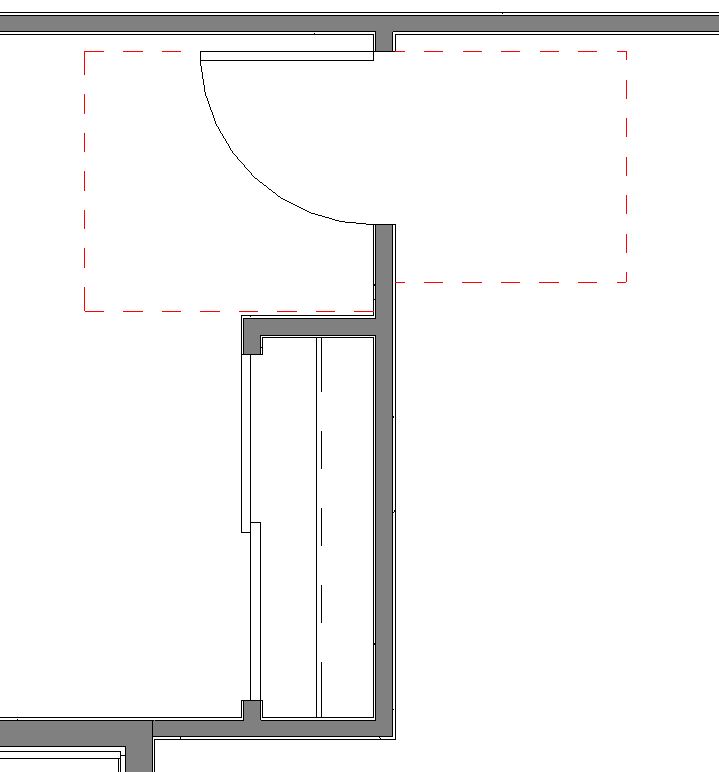
Here is the end product. These clearance lines will automatically adjust depending on door size and of course they will move with the door as well. This would be a good addition to other families as well (washers, dryers, sinks, drinking fountains, toilets, etc.).