Plan sets almost always have a cover sheet with an index that lists all of the sheets that are in the set. Revit has the ability to generate this sheet list (and update it) somewhat automatically, but the process is not completely straight-forward. This article will take you through the basic steps to create a working sheet index.
For the sake of this guide, we will use a project that is already populated with a number of named sheets that would be somewhat typical to an architectural project.
Step 1: Go to View -> Schedules -> Sheet List

Step 2: Select the attributes that you would like to have displayed on the list under the “Fields” tab. It is VERY IMPORTANT that you add the “Sheet Index” option. This will determine the order that the sheets will appear in the list.
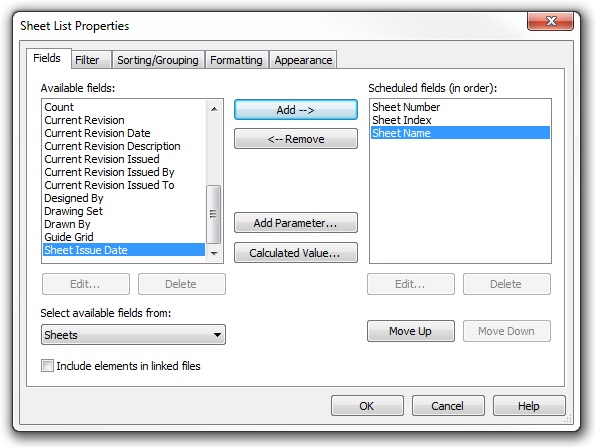
Step 3: Go to the “Sorting/Grouping Tab,” select “Sheet Index,” make sure that the “Ascending” radio button is selected and click “OK.”

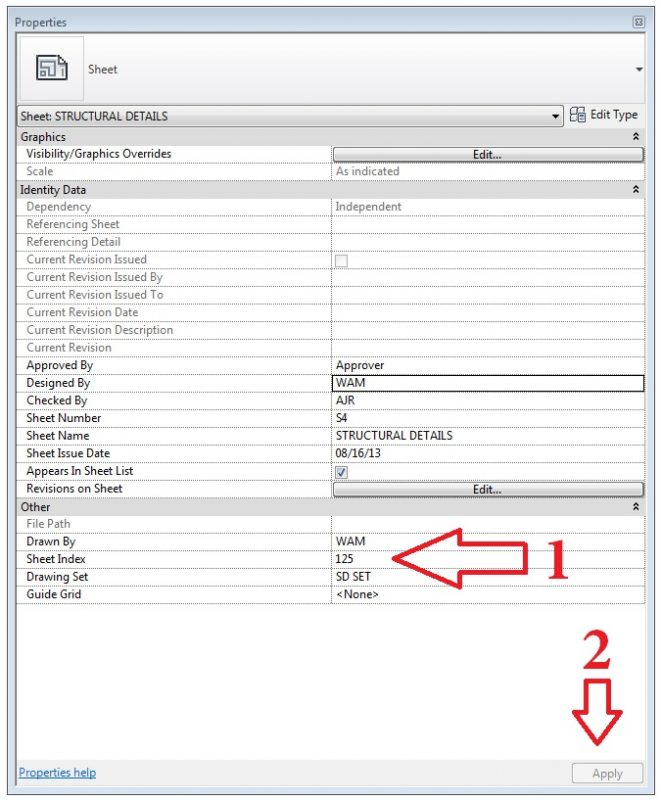
Step 4: At this point, the sheet list has been generated, but there is a problem. Sheet “S4” was recently created and no sheet index number was added. Therefore, Revit doesn’t know where to place it in the list. All of the other sheets were numbered by 10’s so that in the event that a sheet was added later, the entire set would not have to be re-numbered and the inserted sheet number could fall between the other sheets in the list. Since it makes sense that sheet S4 should fall after sheet S3, we will change this sheet index number to “125” in the next step.

Step 5: To fix the sheet index, we will select sheet S4 from the Project Browser and then look at the Properties. We will change the previously blank Sheet Index entry to “125” and hit “Apply.”
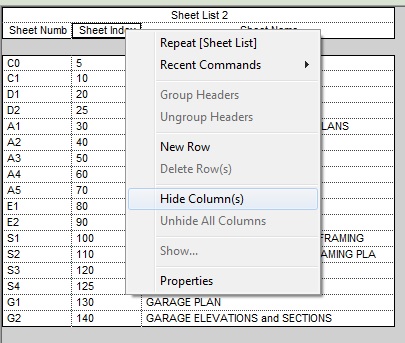
Step 6: If we go back to the Sheet List (which can be found in the project browser under “Schedules/Quantities,” we will notice that the sheets now appear in the correct order. Since we don’t need the “Sheet Index” to appear in the schedule, we will right-click on “Sheet Index” Column and select the “Hide Column(s)” option.
Step 7: The final step in adding the sheet list to our project is to use the project browser to navigate to the cover sheet (or whichever sheet you choose for the appearance of the list), go to View -> View (Place View button shown), and then select the sheet list from the list of available views.


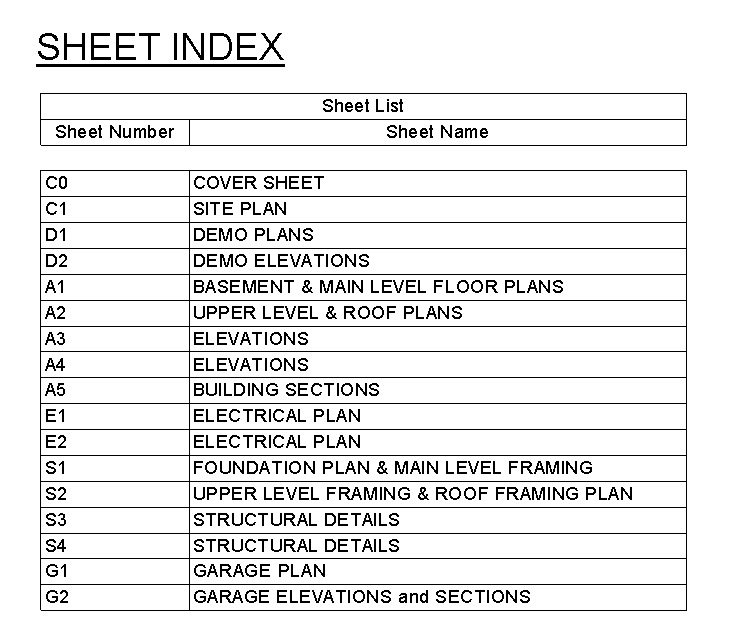
Step 8: Place the sheet list and adjust the column widths. The sheet list should look something like this: